
Learn how to crochet a Sunburst Granny Square with this simple step-by-step tutorial. Perfect for beginners and seasoned crocheters alike!
What’s a handicraft you could do in your sleep? Something nostalgic and comforting that makes you feel relaxed and productive all at once. For me, it’s crochet.
I first learned to crochet from a family friend named Cami. She held crafting nights at her home for all the young girls in our church community, and that’s were I first learned the basic crochet stitches. I have some really sweet memories of those evenings, and have even taught my own fair share of young girls to crochet now too (including my own two daughters)!
These days I mostly prefer the look of knitting, and am slowly teaching myself to knit and purl. But there’s something so nostalgic about crochet that I love. It’s a comfortable thing to know the foundations so well that learning new stitches is a breeze. I love to cozy up on the couch at the end of a long day and put a few more stitches in, or work up another granny square. It’s easy enough to do during a family movie night too. I get to relax and feel productive at the same time! A win-win for this creative, busy farm mama!

What is a Granny Square?
A Granny Square is one of the most classic crochet blocks. It’s a square worked in the round, starting at the center and working outward, usually with a combination of different stitches to create a unique design. Granny squares are often crafted in multiple colors of yarn, and are the foundation for a variety of crochet projects like blankets, scarves, cardigans, bags, and more!
Some granny squares have the potential to look a little dated, but there are plenty of both new and classic designs that are beautiful and can add a bit of fun and whimsy to the modern home!
Sunburst Granny Squares
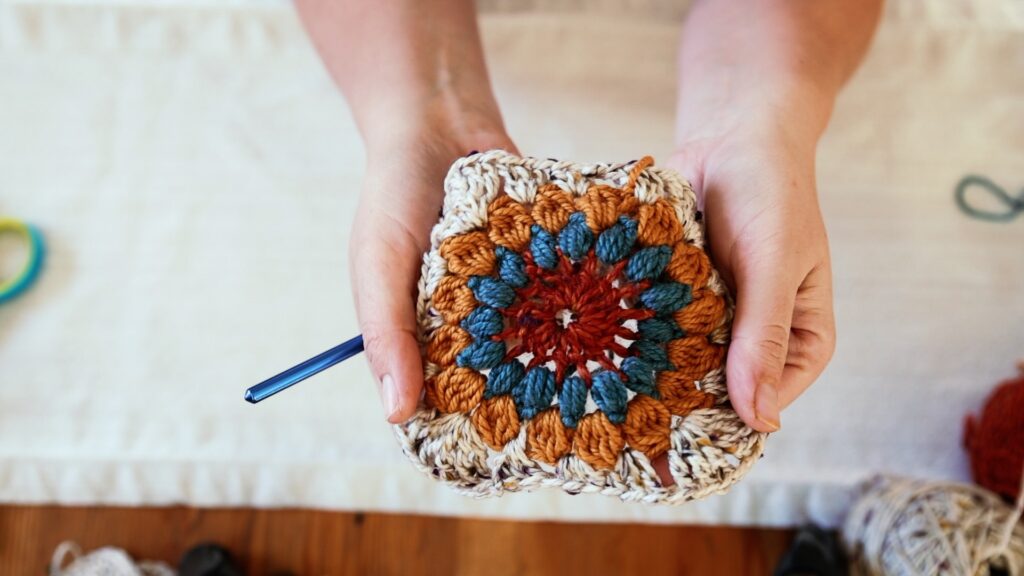
My favorite granny square motif is the Sunburst Granny Square. It looks a little like a sun and a little like a flower. I love being able to mix and match colors to create a wide variety of aesthetics. I’ve used this motif to create baby blankets, scarves, Christmas ornaments, and even dish cloths and potholders too!
Currently I’m working on a crochet Sunburst Granny Square blanket for our new living room addition. I thought it was a good opportunity to share a little tutorial for my method of making this classic granny square. I’ll be sure to check back in with another post to share the final result!
What Kind of Yarn Should You Use to Crochet a Granny Square?
Honestly, this is a personal preference. I’ve made Sunburst Granny Squares with worsted weight acrylic yarn, fingering weight alpaca yarn, and everything in between! Currently I’m using some lovely merino wool from KnitPicks, which I’ll link below.
I recommend worsted weight yarn for this tutorial, as it is an easy yarn to work with. Bulky yarns don’t tend to be a good fit for making granny squares like these. You can use a fine yarn if you like, just use an appropriately sized hook and expect your squares to turn out much smaller than the ones in this tutorial.
For this project I’m using worsted weight Merino wool yarn from KnitPicks. The yarn is all from the Twill and Provencial Tweed collections.
I used the colors Dungaree, Voyage Heather, Gold Rush, and Fiddlehead Twill yarn, and Pumpkin Pie, Caramel, and Cream Tweed yarn.
What Size Hook Should You Use to Crochet a Granny Square?
If you are using worsted weight yarn, I recommend using an H, I, or J sized crochet hook (5mm, 5.5mm, or 6mm). Choose which size feels more comfortable for you, depending on how tight or loose you like your stitches. The finished size of your squares may vary slightly depending on which hook size you choose, and how tight you make your stitches. I chose a J hook (6mm).
Stitches Used in a Sunburst Granny Square
The stitches we’ll use in this tutorial are fairly simple. You’ll be using a Double Crochet Stitch, Half Double Crochet Stitch, and Treble Crochet Stitch, in addition to a Puff Stitch and Cluster Stitch. Since we are working in the round, we’ll start off with a Magic Ring. Instructions for the Magic Ring, Puff Stitch, and Cluster Stitch can be found within the Sunburst Granny Square tutorial below. For additional help with stitches, be sure to check out the video tutorial below!
** Please note that all crochet stitch terms used are US terms
Crochet Stitch Abbreviations Used:
- Chain (ch)
- Slip Stitch (sl st)
- Double Crochet (dc)
- Half Double Crochet (hdc)
- Treble Crochet (tc)
- Puff Stitch (puff)
- Cluster Stitch (cluster)
Sunburst Granny Square Crochet Tutorial
Remember that this pattern is worked in the round. It can be easy to lose track of stitches, so be sure to count each round of stitches before fastening off! Each round will have 16 stitches.
Note: I know many tutorials will call for augmenting the first stitch after joining with a ch2 by decreasing the number of yarn-over’s or double crochets in that stitch to reflect adding the ch2. I find this to make odd-looking stitches and get me out of the groove when I’m on a roll with my stitches. I’ve written this tutorial the way I like to crochet, and not changed anything about those first stitches. I just ch2 to join and then make my stitch in that same space. However, if this bothers you or you prefer the look of adjusting the stitch, go ahead and do what works best for you!
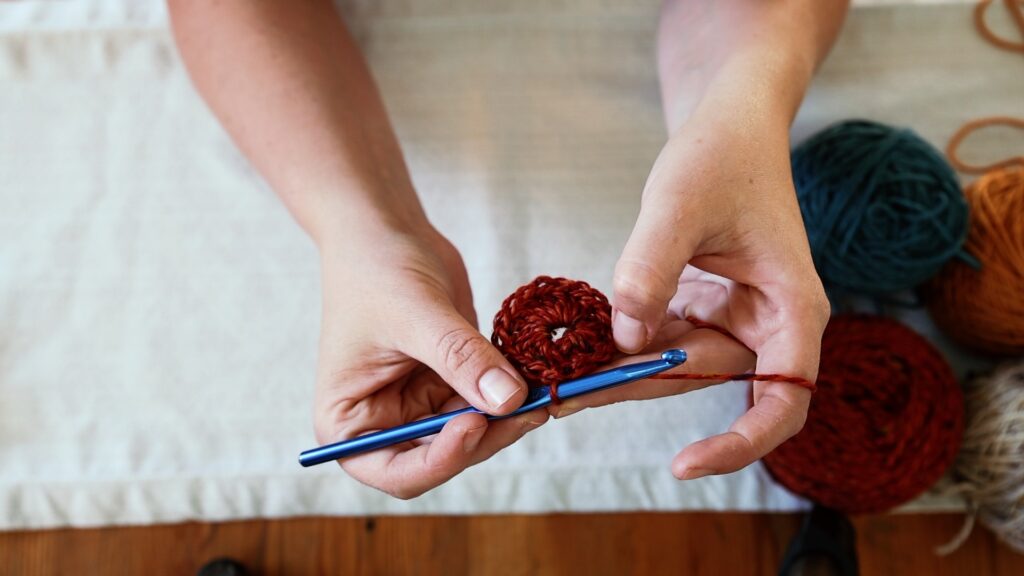
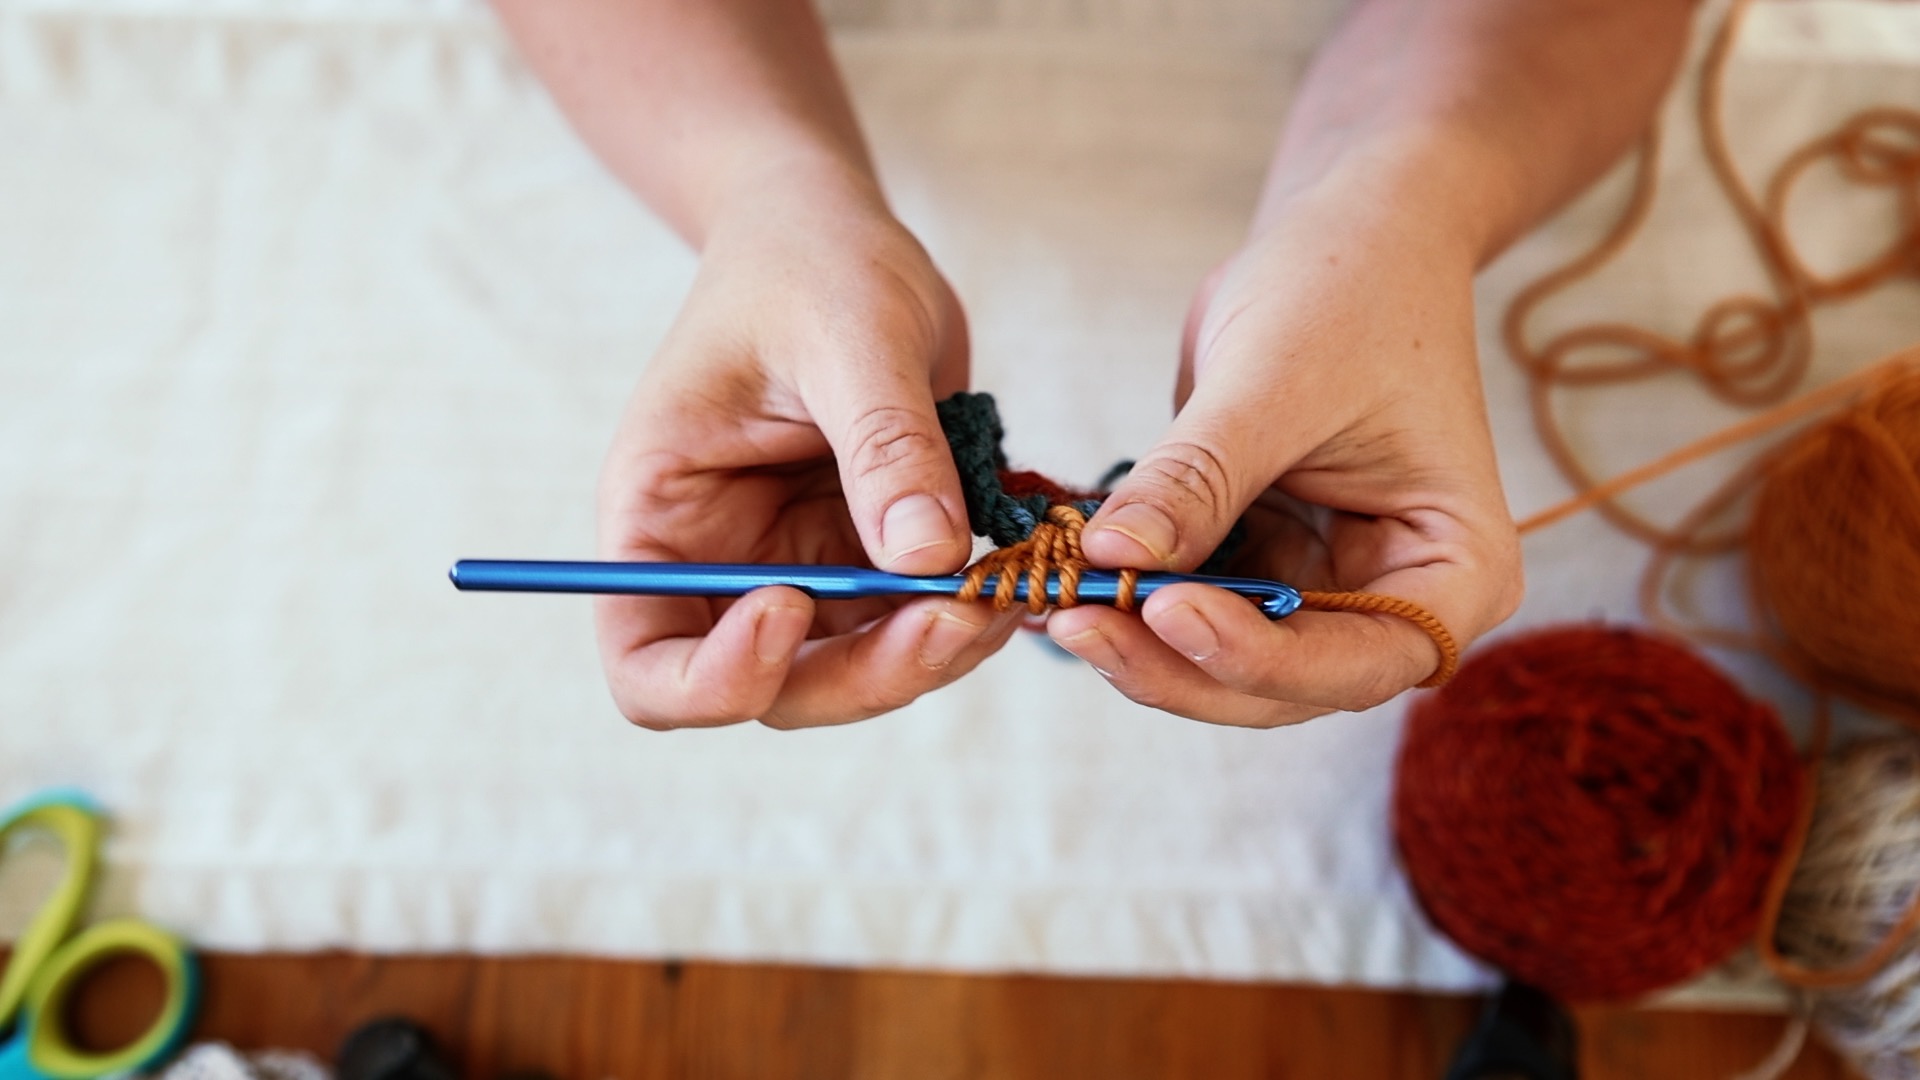
Round 1 (Pumpkin Pie Tweed):
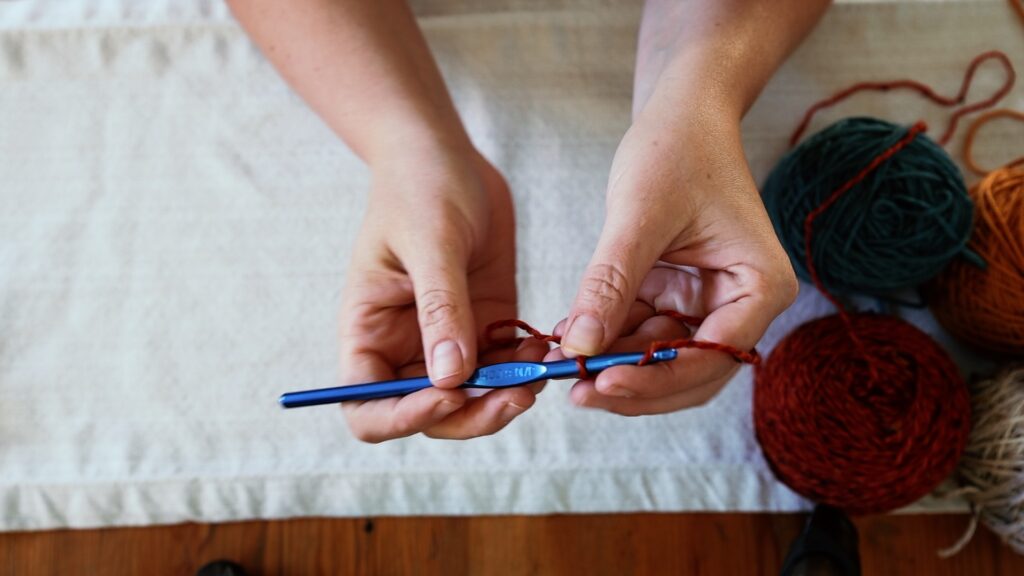
Start by making a Magic Ring. To make a Magic Ring, ch 4, sl st into the first ch to make a loop. Now you can make all of the stitches in this round into the loop to create a circle center for your sunburst.
Ch 2 to start the round, then dc 15 around the Magic Ring. Sl st into the first ch 2 stitch to close. This makes 16 stitches total, and the foundation for all of the other rounds in the granny square. Fasten off and tug gently on both tails of yarn to tighten the circle a bit before your next round.

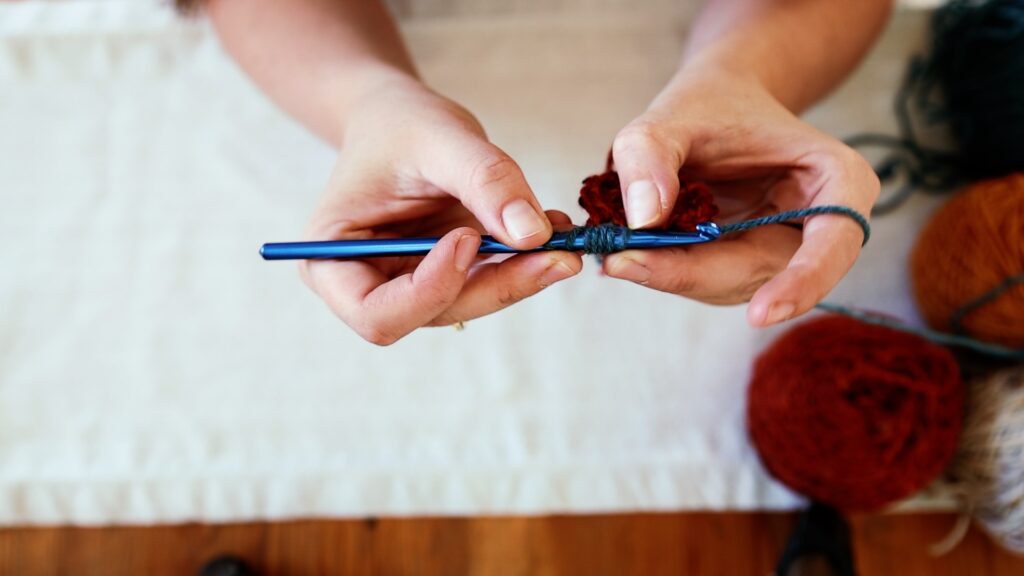
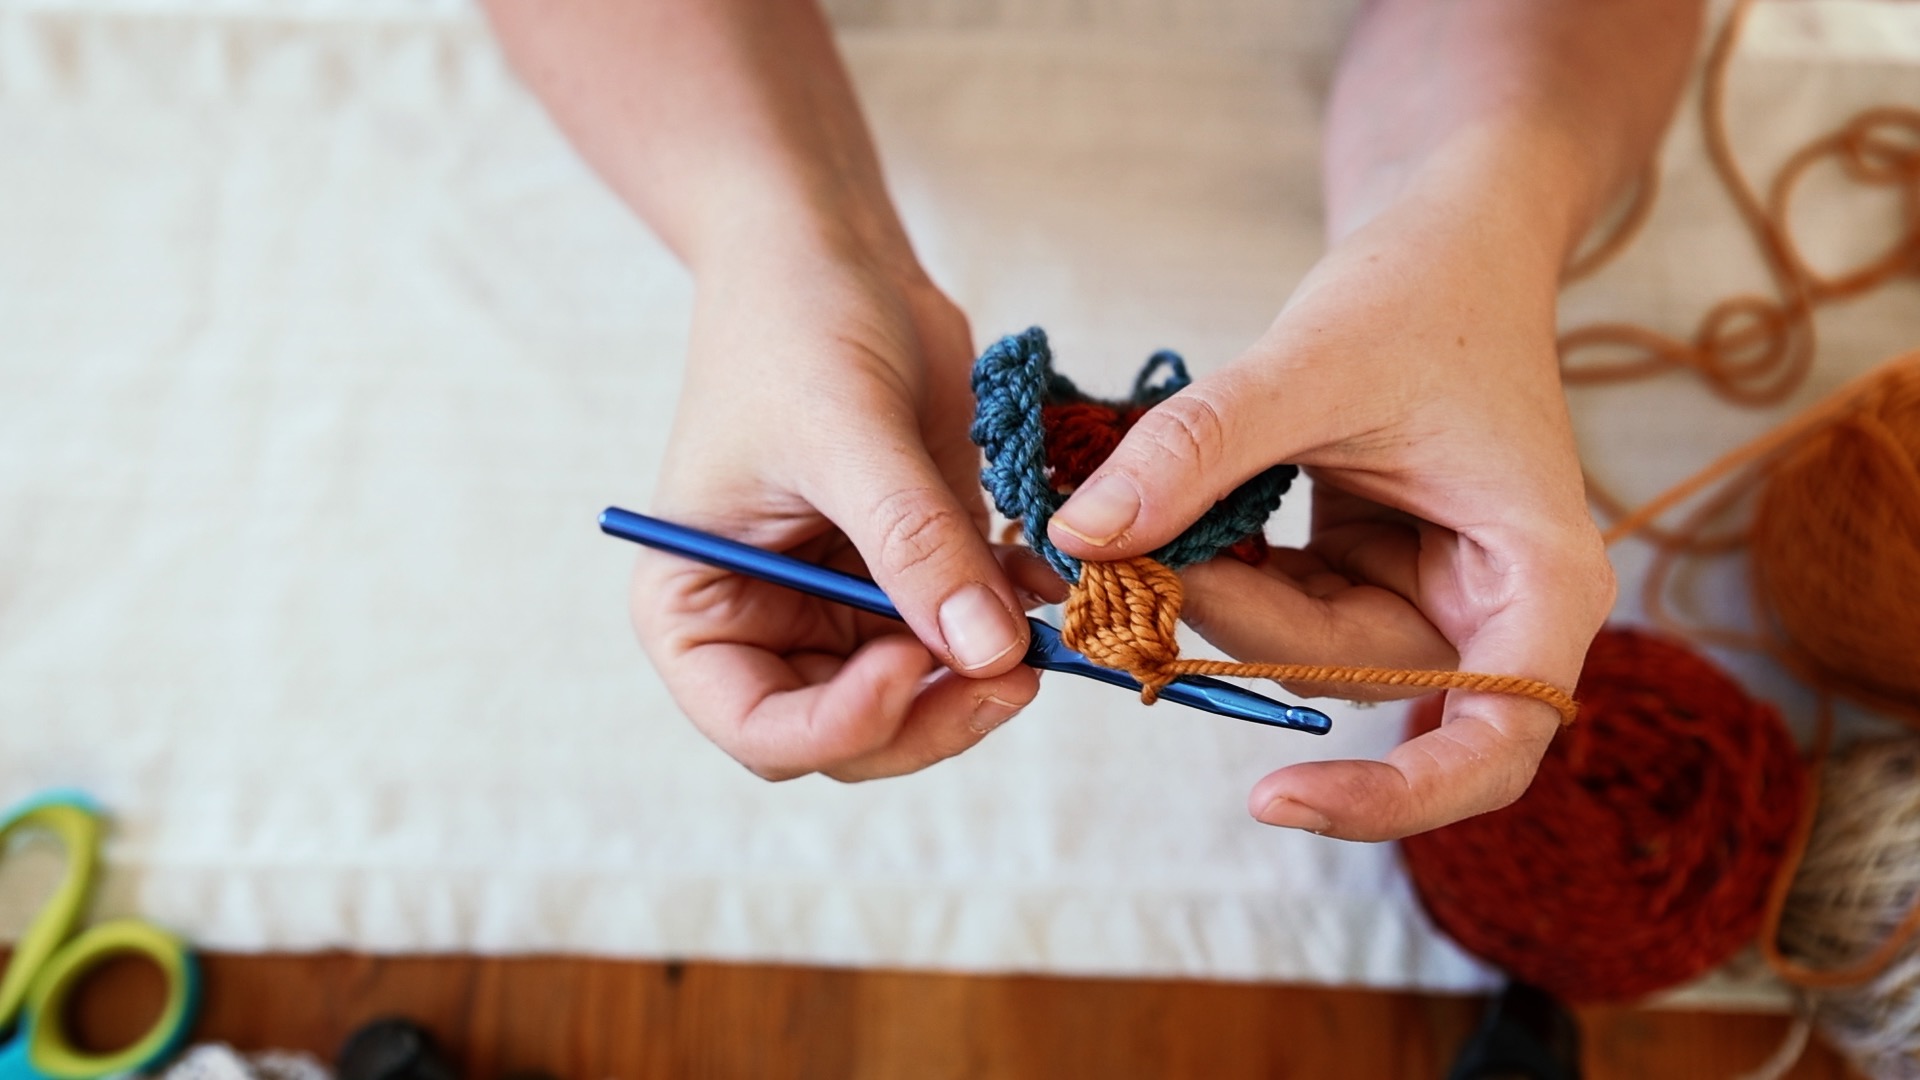
Round 2 (Voyage Heather):
This next round will be a round of Puff Stitches. Join your next color of yarn to the first round by chaining 2 in any stitch of the previous round. Then puff stitch into the same stitch. Puff stitch into every stitch around, then join with a sl st to the first puff and fasten off (16 stitches total).
How to Crochet a Puff Stitch
- Yarn over. Insert your hook into the stitch and pull up a loop (3 loops on hook)
- Yarn over. Insert your hook into the same stitch again and pull up a loop (5 loops on hook)
- Yarn over. Insert your hook into the same stitch a final time and pull up a loop. You should have 7 loops on your hook.
- Yarn over and pull through all 7 loops.
- Chain one to close the stitch.
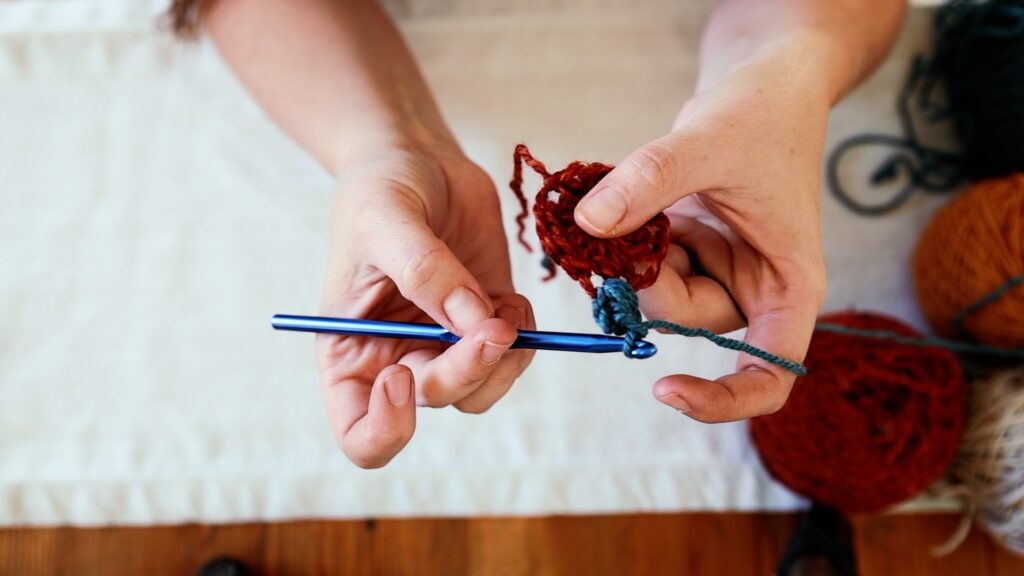

Round 3 (Gold Rush Yarn):
This round will be made up of Cluster Stitches. We’ll be making the Clusters in the ch1 spaces from the previous round of Puff Stitches.
Start by joining with a new color of yarn by chaining 2 in any ch1 space from the previous round. Create your first Cluster Stitch in the same space. Cluster Stitch in every ch1 space. Join the first and last clusters with a sl st and then fasten off (16 stitches total).
How to Crochet a Cluster Stitch
A cluster stitch is essentially crocheting 4 double crochet stitches together.
- Yarn over, then insert your hook into the ch1 space and pull up a loop. Yarn over and pull through 2 loops (2 loops on hook)
- Yarn over, insert your hook into that same ch1 space and pull up a loop. Yarn over and pull through 2 loops (3
- Yarn over, insert your hook into the same ch1 space and pull up a loop. Yarn over and pull through 2 loops (4 loops on hook)
- Yarn over, insert your hook into the same ch1 space one final time and pull up a loop. Yarn over and pull through 2 loops (5 loops on hook)
- Yarn over and pull through all 5 loops. Ch1 to close.
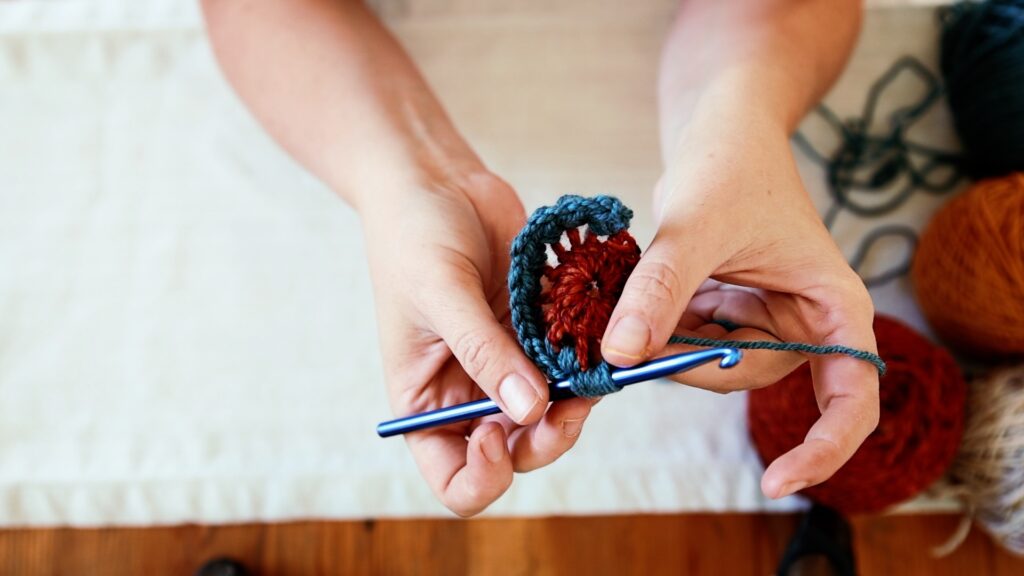
Round 4 (Cream Tweed Yarn):
The final round of our granny square will create a square border around the sunburst we’ve created so far.
To turn our round motif into a square, we’ll be crocheting four sides and four corners using a pattern of 3 dc, 3 hdc, 3 dc for the sides, and a series of 3 tc stitches, ch2, 3 tc for the corners.
Start by inserting your hook into any ch1 space from the previous round. Ch 2 to join, then make two double crochet stitches in the same ch1 space (counts as your first 3 double crochets). In the next ch1 space, make 3 half-double crochet stitches. In the next space, crochet 3 double crochet stitches. This completes the first side.
Now, to create a corner we’ll make 3 treble crochet stitches in the next ch1 space. Ch2, then make 3 more treble crochet stitches in the same space. This completes the first corner.
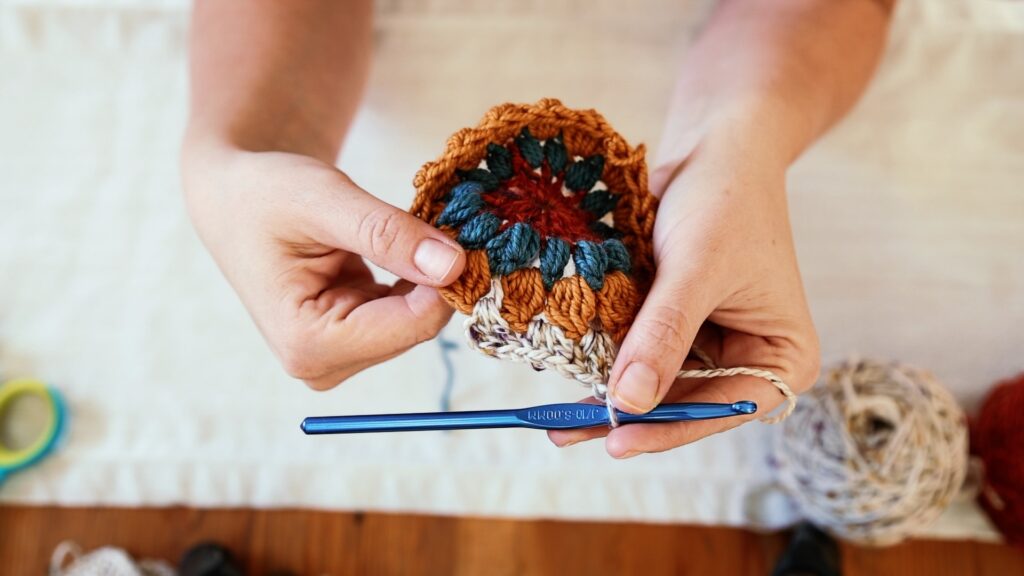
We’re going to keep up the same pattern all the way around the sunburst.
Three double crochet in one space, three half-double crochet in the next space, three double crochet in the next space. Than a corner. A corner is made up of three treble crochet, chain two, then three more treble crochet all in the same space.
Continue this pattern until you’ve made a square all the way around the sunburst circle. Join the last corner to the first double crochet with a slip stitch and then fasten off.

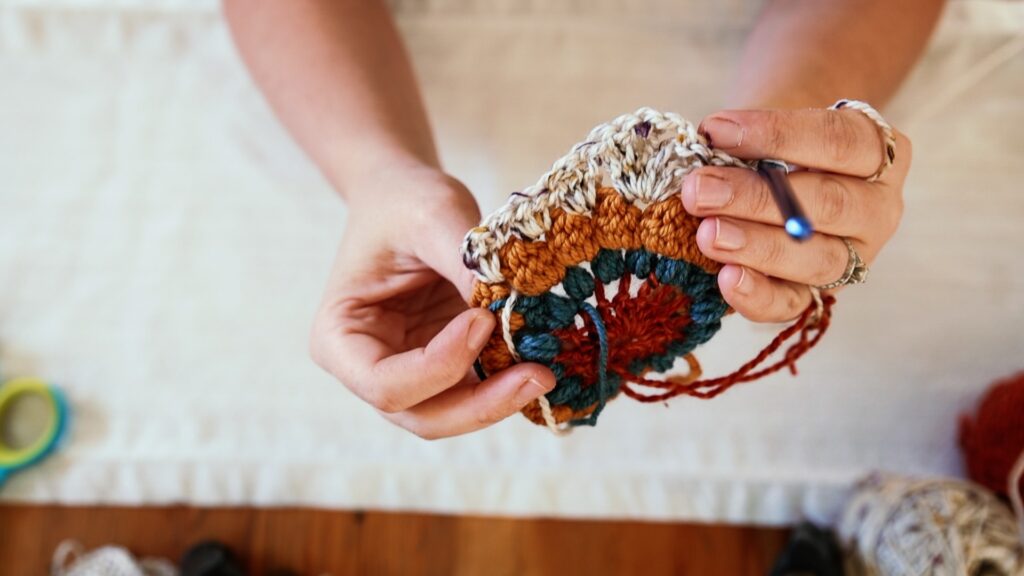
So we’ve officially crocheted a Sunburst Granny Square! Now we just have to weave in the ends.
There are lots of different ways to finish a crochet project, so feel free to use your favorite method for weaving in the ends. Mine is to use a tapestry needle and work the yarn down to a section with the bulkiest stitches. I weave the yarn tail back and forth multiple times, changing direction if possible too, just to help keep them from unraveling with use. It can be helpful to weave the needle into the yarn fibers a few times too before burying the tail in the bulk of the stitches.
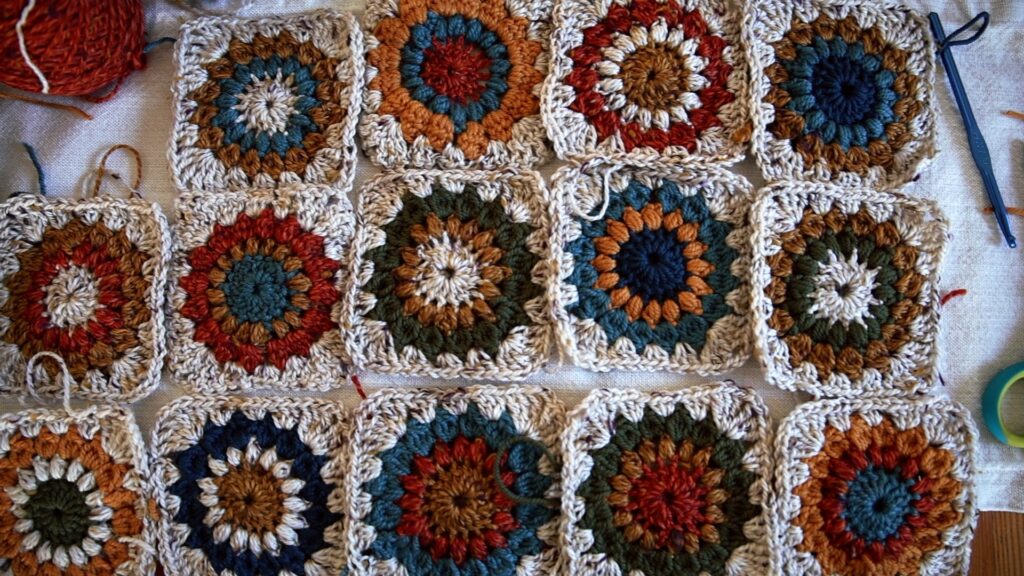
Well, that’s it! My simple method for crocheting my favorite granny square. I’m currently spending every Sunday afternoon crocheting lots of these squares. When I’ve made enough to piece together a blanket I’ll have a movie night and weave in all the ends. Then I’ll block all the squares and join them either by single crocheting them all together or with a whip stitch.
I hope you enjoyed this tutorial and that it inspires you to go out and make some beautiful granny square projects yourself!
Happy crafting!