
Make the best ever goat milk mozzarella using this beginner-friendly recipe. No microwave, no rubbery cheese, just flavorful mozzarella!
Mozzarella is commonly considered a good beginners foray into cheesemaking, but it can be a deceptively simple cheese. Check out any dairy Facebook group or cheesemaking forum and you’ll find a crowd of milkmaids wondering what on earth they did wrong with their mozzarella!
Goat milk adds even more of a curveball when it comes to making mozzarella. With its fragile molecular structure, goat milk requires some extra care when making cheese. It’s easy to overheat or overstretch the curds and create a gloppy mess or a tough cheese that’s practically inedible. The ever-popular “quick” microwave mozzarella recipes, or recipes acidified with purely citric acid make things even worse, and the resulting cheese is often gummy and bland, instead of the rich and flavorful cheese we all envision.
The good news is that there’s an easy method to making the delicious goat milk mozzarella of your dreams.
And the secret to nailing both texture and flavor?
A hybrid recipe.
What Is A Hybrid Mozzarella Recipe?

In a hybrid mozzarella recipe, you use both freeze dried bacterial cultures to acidify the milk, as well as citric acid. This allows the process to be significantly sped up, while still allowing for rich flavor and amazing texture in the finished cheese.
Often the mozzarella recipes you’ll find marketed to beginner cheesemakers are quick ones. You see, mozzarella requires the correct ph to stretch and attain that classic texture. It’s what makes string cheese “stringy” and gives mozzarella that smooth, shiny look.
Naturally acidifying mozzarella can take several hours or even a couple days to achieve, depending on the recipe. Because of this, many quicker recipes use citric acid to raise the acidity of the curds to get them to the right ph for stretching.
While this fast track does result in a stretchy cheese, it loses that delicious mozzarella flavor more often than not. In my experience, goat milk mozzarella is very bland and takes on an odd, gummy texture in recipes that use only citric acid. Microwave recipes result in tough, overworked cheese too.
I first got the idea of using both cultures and citric acid for mozzarella from Hammock Haven Farm. Her methods inspired this recipe.
This hybrid method really is the best of both worlds.
What’s not to love?!
Do I Need A PH Meter to Make Mozzarella?
The best cheesemakers use ph meters to check the acidity level of the milk and curds multiple times through the cheesemaking process. However, for beginner cheesemakers, or busy moms like myself, a ph meter simple isn’t necessary. I get by just fine without one, and you can too.
Sure, my cheese would probably be even better if I did monitor the ph of my curds, but at this stage in my life adding in something extra like that would become a burden to me, so it’s just not worth it.
How Do You Make Goat Milk Mozzarella?
The process for making a hybrid goat milk mozzarella is simple:
- Warm half of the milk to 90°F and add both mesophilic and thermophilic cultures.
- After the warmed milk has acidified, you’ll add citric acid to the remaining half of chilled milk.
- Mix the two milks together, and heat it all up to 90° again.
- Next you add the rennet and allow the milk to coagulate.
- Cut the curds, then stir infrequently for 30 minutes.
- Strain the curds from the whey and then allow the curds to mellow in a colander for 30 minutes.
- Heat water to 180°F and cut the mozzarella curd into large pieces.
- Place one piece of curd into the hot water at a time, and once it is warmed and pliable, stretch it gently a few times before rolling it into a ball or string cheese.
- Cool the mozzarella in ice water before moving to a saturated brine for an hour or two.
- Store in the fridge for about 10 days or in the freezer for about 6 months.
What Supplies Do You Need to Make Mozzarella?
Mozzarella, like other semi-soft cheese such as Feta, require very little equipment to make. You don’t need a fancy cheese press or molds, and because mozzarella is a fresh eating cheese you don’t need an aging space either!
You will need a few supplies and ingredients to get started making goat milk mozzarella. Once you’ve purchased them, most of the ingredients will last for months in the fridge or freezer. And then you’ll have them on hand for making mozzarella whenever the mood strikes or the milk fridge starts looking too full!
Affiliate Disclosure: the list below includes affiliate links, which may earn me a small commission on your order, at no extra cost to you.
To make goat milk mozzarella you’ll need:
- A large Stainless Steel Pot
- A Stainless Steel Slotted Spoon
- An Instant-Read Thermometer
- MM100 Mesophilic Starter Culture
- TA 61 Thermophilic Starter Culture
- Organic Citric Acid
- Liquid Single Strength Animal Rennet
- Calcium Chloride
- Food Grade Gloves
Some other supplies I use regularly in my cheesemaking, but aren’t totally necessary to have are:
For a full list detailing all of my favorite cheesemaking supplies and ingredients, check out this post on the blog.
**2025 Update: I now recommend using less cultures and rennet for this recipe to achieve the best results with your goat milk mozzarella.
I now recommend
- 1/8 tsp MM 100
- 1/8 tsp TA 61
- 1 tsp citric acid
- 1/2 tsp single strength animal rennet
A Note About Stretching the Curds:
As I mentioned earlier, goat milk is a more delicate milk to work with when making cheese. This means you’ll need to be more gentle when stirring, probably stir for less time than most recipes suggest, and keep a close eye on your temperatures and consider lowering them by a couple degrees.
This recipe has been written specifically for goat milk, so you don’t need to worry about any of those things. But you will need to be especially careful during the stretching phase of making mozzarella.
I’ve found that doing 3 or 4 gentle stretches (really just pulling the curds and folding them over on themselves) is PLENTY for goat milk mozzarella. It’s tempting to pull the curds and stretch them as far as you can, but you’ll only end up with a tough cheese.
On the other hand, mozzarella really does require that stretching phase to create that classic texture. So be sure you’re stretching and folding the curds over at least a few times with each chunk of curds you work with.
How to Make a Saturated Brine
Some mozzarella recipes call for adding lots of salt to the whey and stretching the curds in the salted whey. Others have you add salt directly to the curds. This recipe uses a saturated brine to salt the cheese and it’s hands down my favorite way. The salt soaks into the cheese thoroughly, resulting in tons of flavor that saturates the whole cheese, not just the surface.
If you already have a saturated brine on hand from making other cheeses, just use that! Brines can be kept for years if they are well cared for.
I have found this recipe for making a saturated brine very helpful in my cheesemaking! Don’t skip the calcium chloride. I can tell you from experience that it’s very handy in preventing cheeses like Feta from disintegrating into the brine. I also love that this brine can be reused practically indefinitely if properly stored and refreshed from time to time!
Basic Process for Making a Saturated Brine:
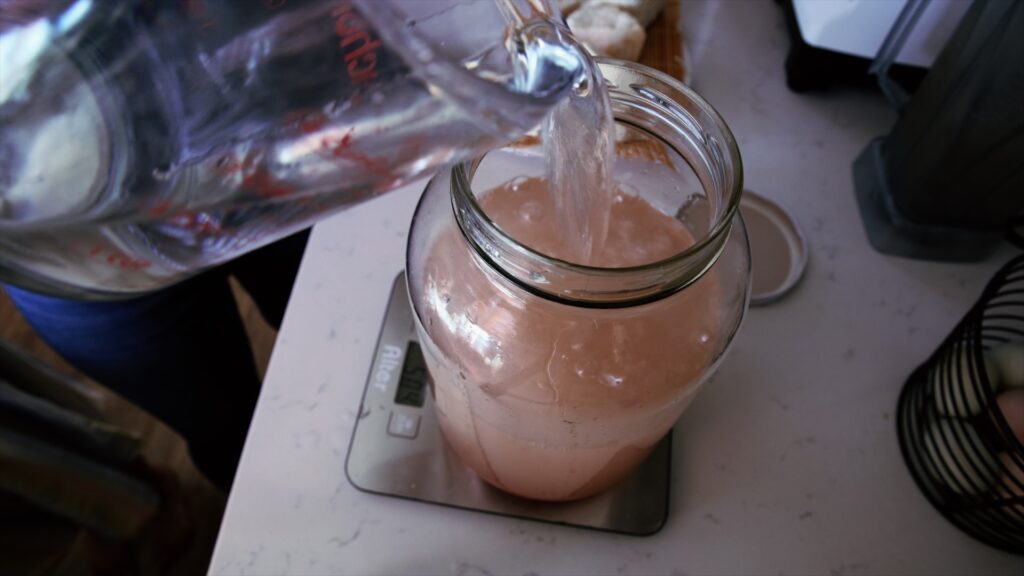
- To 1 gallon of non-chlorinated drinking water, add 2.25 lbs of non-iodized salt, 1 Tbsp calcium chloride (30% solution), and 1 tsp of white vinegar.
- Stir the mixture together in a large non-reactive container, such as a gallon glass mason jar.
- Store in the fridge when not in use, and always stir the brine before using.
- A saturated brine is created by adding salt until no more can be dissolved in the water. There will always be a sediment of salt at the bottom of the jar, and the cheese should float in your brine.
Goat Milk Mozzarella Recipe:
Feel free to halve or quarter this recipe as needed, depending on how much milk you are working with.
Goat Milk Mozzarella
Ingredients
- 4 gallons Raw Goat Milk (divided) You can use raw cow or sheep milk for this recipe too. For cow milk you may need to stir and stretch a bit longer.
- Scant 1/8 tsp MM100 Mesophilic Culture
- Scant 1/8 tsp TA61 Thermophilic Culture
- 1 tsp Citric Acid Dissolved in 1/4 cup of cool, non-chlorinated water.
- 1/2 tsp Single Strength Liquid Animal Rennet Dissolved in 1/4 cup of cool, non-chlorinated water
Instructions
- Begin by heating 2 gallons of milk to 90°F. Leave remaining 2 gallons chilled.
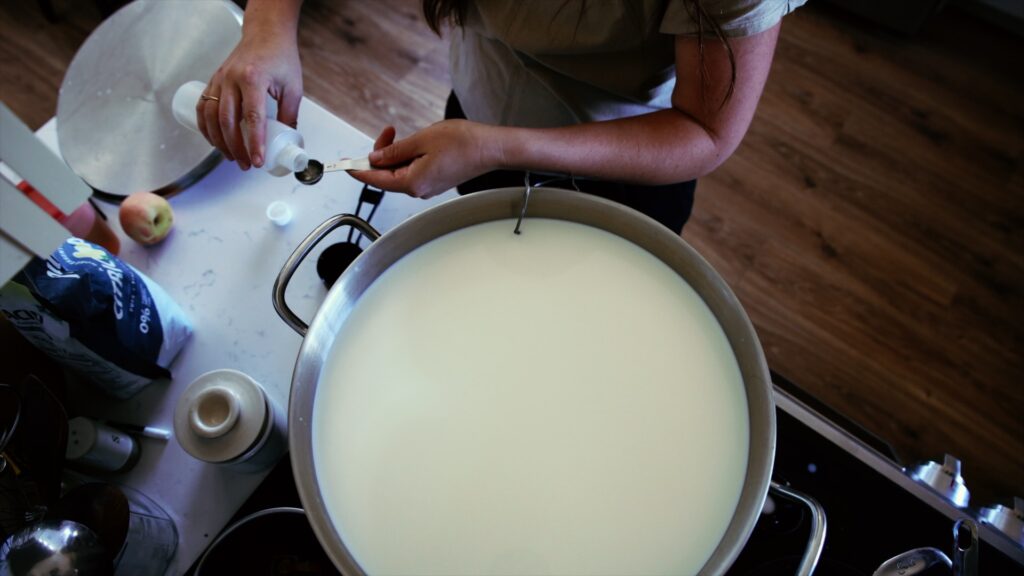
- Sprinkle both the Mesophilic and Thermophilic cultures onto the warmed milk. Allow to rehydrate for a minute, then stir in well. Leave the milk to culture for 30 minutes.
- After the warm milk has cultured, add the citric acid solution to the chilled milk and stir thoroughly. You can do this either in a medium-sized pot, or just in the milk jars. Add the cold milk into the warm milk pot. Stir well to combine, and then heat the whole pot of milk back up to 90°F.
- Pour the diluted rennet into the 4 gallons of milk. I like to do this over a slotted spoon or spatula to evenly disperse the rennet. Then gently stir it in with an up and down motion. Try not to break the surface of the milk. Stir for about a minute, then allow the milk to become still. It will begin to coagulate quickly.
- Leave the curd to set for about 30 minutes. When you check it, it may look a bit stretchy, and different from a regular cheese curd. This is due to the citric acid, and is perfectly normal.
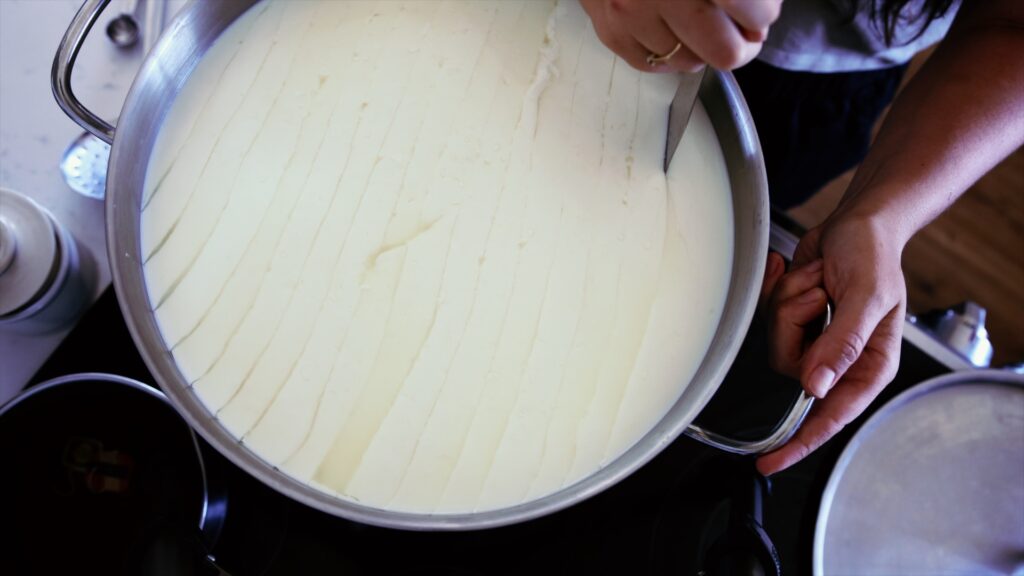
- Cut the curd into 1” cubes, pausing for 5 minutes between each new set of cuts to allow the curds to “heal." See video for more details on cutting the curd.
- Gently begin to stir the curds, bringing them up from the bottom of the pot. Don’t worry about cutting any overly-large curds down to size. Stir them gently and infrequently over the next 30 minutes, while heating the curds and whey to 110°F. You will need very little stirring; just enough to keep the curds from settling to the bottom and burning.
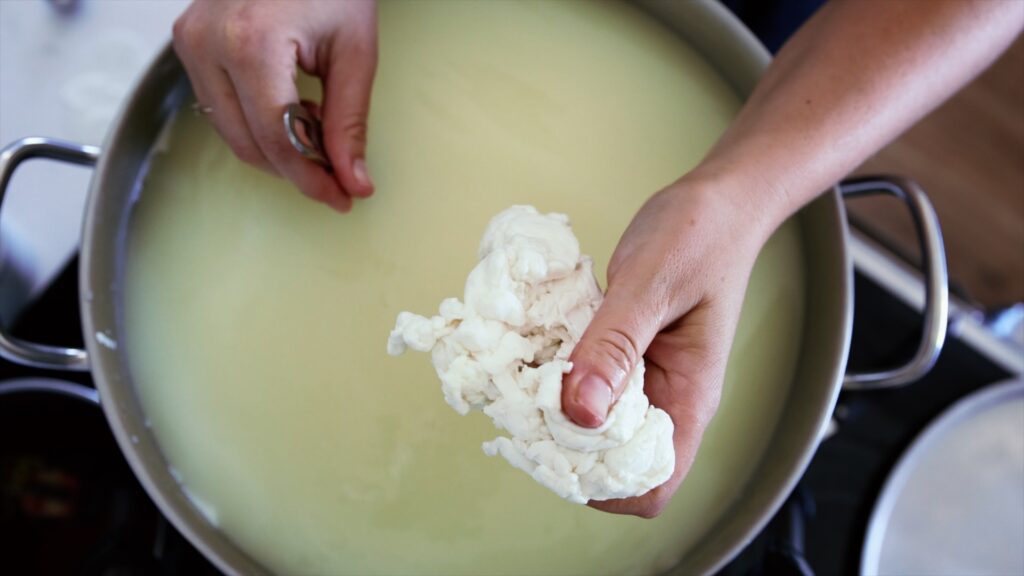
- At the end of 30 minutes the curds should be starting to form a large mass, and look rather stretchy. Let them settle to the bottom of the pot, and remove from the heating element.
- Pour off as much whey as you can from the pot, then set aside the curd mass to mellow. You can use a colander if it will fit in your pot. I prefer to pour off all the whey and keep the curds in the pot. Either way, drain off the whey, and return the curds to the pot either directly or in a colander. Let the curds rest in the pot, covered, for 30 minutes. Keep a thermometer in the curd mass to make sure they maintain about 110°F. You can fill a gallon ziplock bag full of warm water and place it on top of the curds to help maintain their temperature.
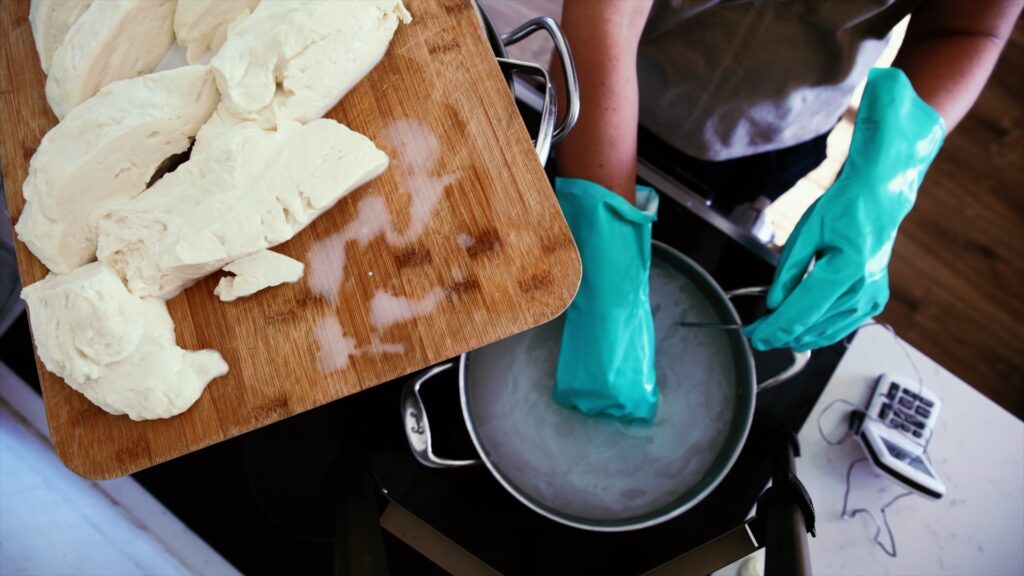
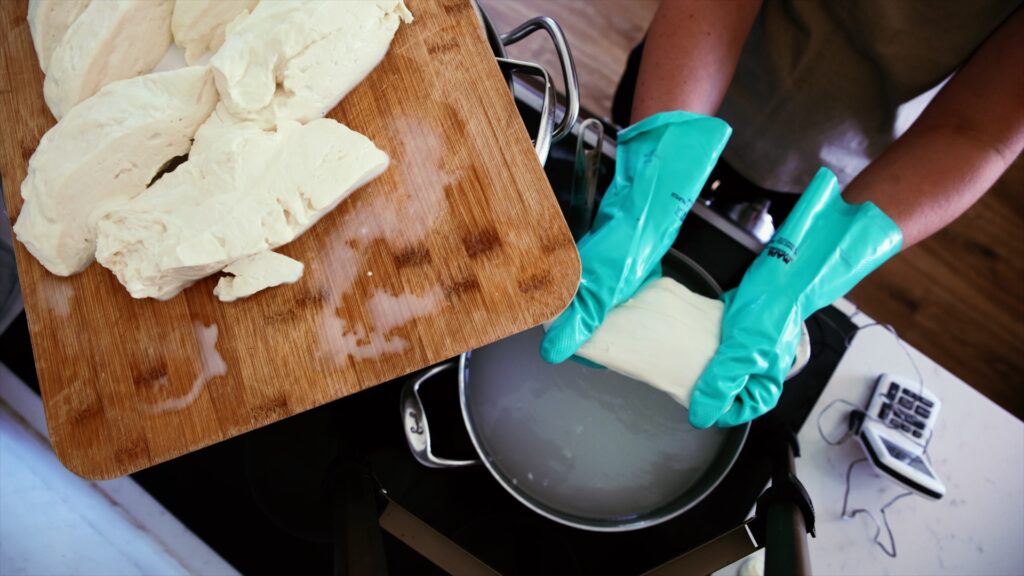
- After 30 minutes, heat a medium sized pot with water up to 180°F. You will be stretching small amounts of the mozzarella at a time in this water. Maintain it between 170°-180°F. Prepare a cooling bath for the finished cheese by filling a large bowl halfway with ice water.
- Pull the curd mass from the pot and set it on a large cutting board. Cut the curd into about 2” strips. Place one strip at a time into the pot of hot water. Using mozzarella gloves, check the curds every few seconds to see if they are ready to stretch. When they are ready they will be pliable and stretch without breaking. Gently pull the curds ever so slightly stretch the cheese. You really just need to double it over onto itself 3-4 times, patting and shaping it as you do so. It’s tempting to really pull and stretch the cheese, like I you would with cow milk mozzarella, but delicate goat milk mozzarella will have the best texture if you are very gentle with it! If the curds get too hot and begin to melt in the water, pull them out and leave them to cool on the cutting board for a couple minutes before stretching.
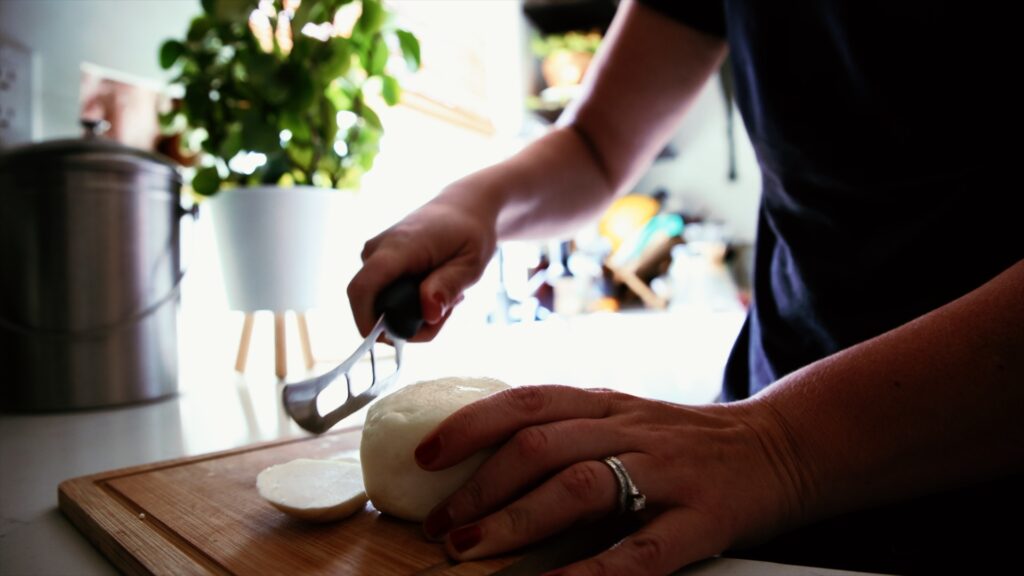
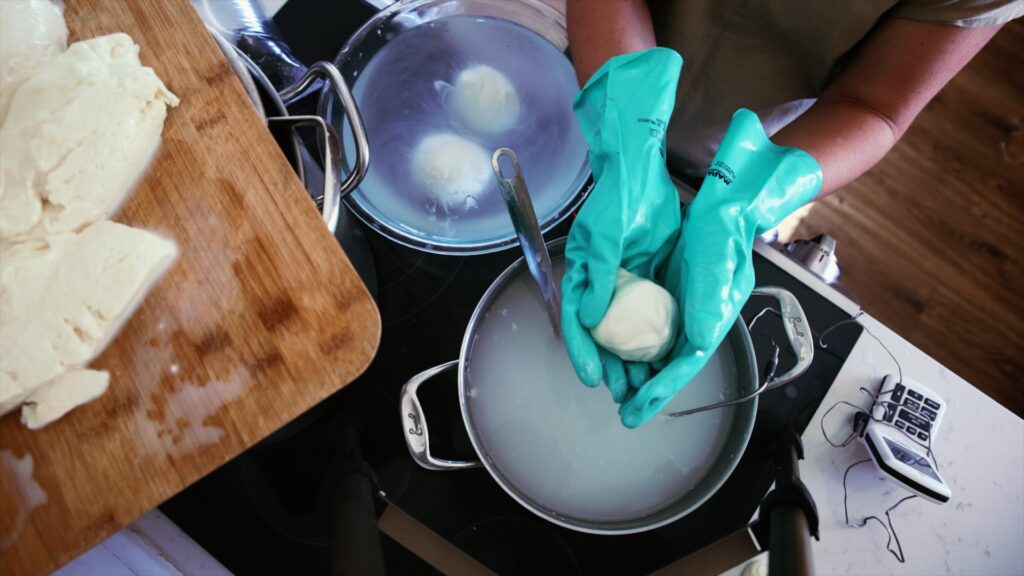
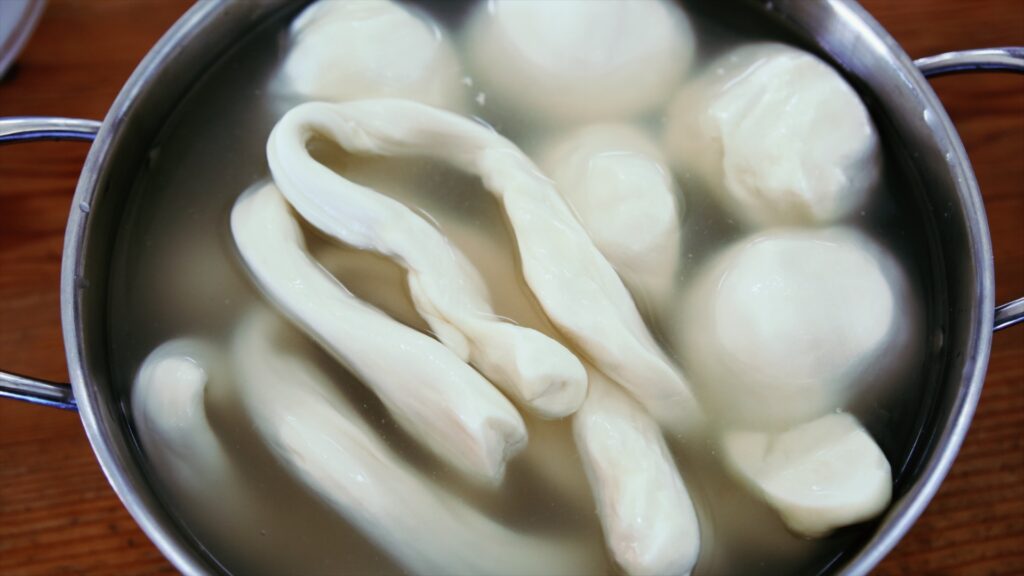
- For balls of mozzarella, double over the strip of hot curds 3-4 times, then gently pat it into a ball. This is much like shaping bread rolls. For string cheese, double the curd strip over a few times before rolling it into a long snake-like rope, about the diameter of a stick of string cheese. You may need to dunk the curds into the hot water a few times as you stretch to keep the curds pliable. When you’ve gotten the shape you desire, place the cheese into the bowl of ice water to cool. See the video for more advice on stretching and shaping the curds.
- Once you’ve stretched all the curds, place the mozzarella balls and string cheese into a saturated salt brine. Allow the cheese to brine until it reaches your desired saltiness. For me, that’s about 1.5 hours for string cheese and 3 hours for mozzarella balls. Be sure the check them and taste after about an hour in the brine to see whether they're salty enough for you. Gently pat the cheese dry and chill in the fridge. You can keep the mozzarella in a glass container or plastic bag in the fridge for about 10 days. Or else freeze the mozzarella for future use! The mozzarella balls shred or slice beautifully, and it melts like a dream. The string cheese should be nice and stringy for snacking too!

So that’s it! A practically foolproof method for making flavorful, authentic goat milk mozzarella without sacrificing your entire day.
If you try this recipe I would LOVE to hear how you like it! Please leave me a comment on this blog post, or on YouTube, or tag me on Instagram! It always makes my day to see people using my recipes.
If you are looking for more FREE goat milk recipes, check out my Feta cheese tutorial!
If you want more recipes designed specifically for goat milk, and wish to learn more about goat milk cheesemaking, check out my signature course Goat Cheese Academy
Until next time, happy cheesemaking!