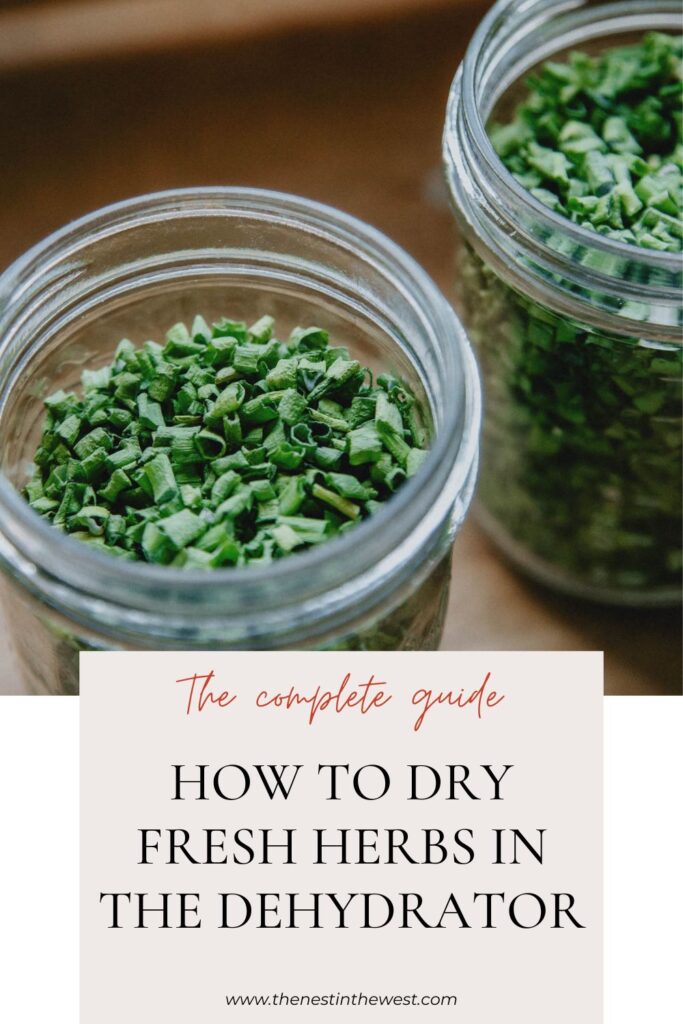

Turning a garden bounty of fresh herbs into delicious, shelf-stable dried herbs is quick and easy with the use of a dehydrator! Not only is it an inexpensive way to stock your spice cupboard, but these freshly dried herbs will be far more flavorful and nutritious than jars that have been sitting on the store shelves for a while.

If you’re anything like me, your Springtime garden is full to bursting with fresh herbs. I always grow more than I can use. While some of my herbs are perennials, many just don’t ever survive our intense Arizona summers. Once the heat of late Spring arrives they go to seed and will start to fry if I don’t pull them out of the garden.
In the past I’ve tried to dry herbs by hanging them in bundles in my kitchen, but in our dusty climate they tend to be too dirty to bother using by the time they’re sufficiently dried. I’ve also dried herbs in my oven at a low temperature, but it can take hours and heats up the house too.
This post contains affiliate links, which means I make a small commission at no extra cost to you.
This year I have a new tool in my kitchen that I’m so excited to put to use! For years I’d been dreaming of purchasing a quality dehydrator to add to my slowly growing stash of kitchen appliances. So you can imagine my excitement when Tribest reached out and asked if I’d like to try their dehydrator and share our experience using it.

Why Dehydrate Fresh Herbs?
There are many reasons to dehydrate fresh herbs, whether they’re from your garden or from the Farmer’s Market or grocery store. Dehydrating herbs allows you to preserve them for future use. It also makes adding delicious, nutritious and flavorful herbs to your meals a breeze since they’re able to be kept right at hand in the pantry or a cupboard. Dried herbs have always held a valuable place in the kitchen and home, and now using a dehydrator makes the job even easier and allows the herbs to remain clean, dust-free, and full of flavor with so little effort.
For me, growing herbs is a treat I love to do each year from Fall-Spring in my Arizona garden. I always grow an abundance of chives, dill, oregano, parsley, thyme, sage, rosemary, and many edible flowers too. It simply makes sense to preserve many of these at the end of the season. This way I can continue using my homegrown herbs as I cook even through the hot summer, when basil is about the only herb still happy to be in the garden.
Do Dried Herbs Have As Many Nutrients As Fresh Herbs?
The short answer is no, dried herbs don’t contain as much nutritional value as fresh herbs do. However, they still pack a hefty dose of phytonutrients and are still a significant source of the benefits that their fresh counterparts contain! For example, thyme is well known to be extremely anti-inflammatory, anti-bacterial, and antiseptic, both in fresh and dried form. Herbs do lose some of their nutrients during the drying and dehydrating process, so to maintain the most beneficial nutrients in your herbs, dry them as soon as you can after harvesting!
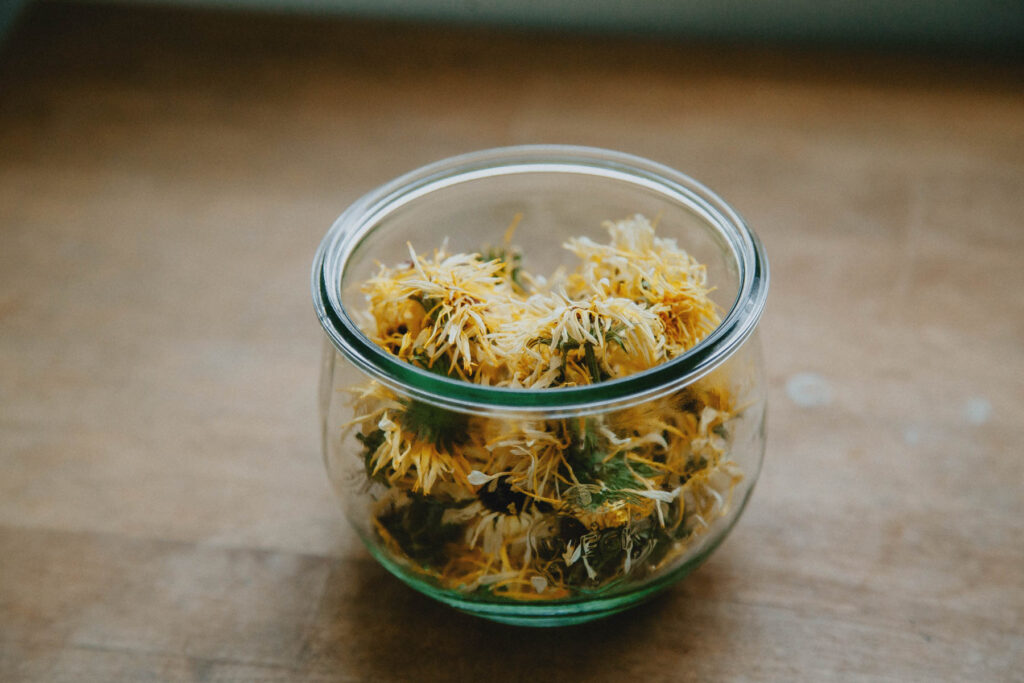
Can You Dehydrate Fresh Flowers?
Yes! Edible and medicinal flowers are well-worth dehydrating to save for adding to tinctures or salves, making teas, or otherwise spicing up a meal with beauty and nutritional value. I dehydrated calendula to save the flower petals for soap making and salves, and making teas!
Are There Any Herbs That Shouldn’t Be Dried?
Any herbs can be dehydrated and dried, but some herbs benefit from different preservation methods too. For example, fresh basil and cilantro maintain more of their flavor when frozen in olive oil or water.
Can You Dry Out Herbs Too Much?
Nope. The dryer the better when it comes to dehydrating herbs for storage! I like to dry my herbs on the “raw” setting on the Sedona Express to maintain the most nutritional value. After the initial 3 hour timer is up, I check the herbs for dryness. Most often they’re perfectly dry, but if some of the juicier pieces aren’t totally dried out I set the timer again. I like to make sure they’re bone dry before I put them in jars for storage.
How Long Does It Take To Dry Herbs In A Dehydrator?
The time will vary depending on the dehydrator you’re using, and the temperature it is dehydrating at. When using the Sedona Express Dehydrator on the raw setting it took most of my herbs about 3 hours. The flowers took more like 4-5 hours.
What Can You Do With Dried Herbs?
Dried herbs are one of the simplest ways to season your food while cooking, and when they’ve been freshly dehydrated at home the flavor is even better than store-bought dried herbs! There are so many ways to use your homemade dried herbs. Here are a few ideas for inspiration:
- Make a beautiful herbal tea
- Make an herbal tincture, salve or calendula healing balm
- Make an herbal season-salt
- Store herbs in jars to add to recipes in the kitchen
- Use in soapmaking
- Use to season homemade cheeses like Chèvre or Homestead Herb Cheese
How Long Do Dehydrated Herbs Last?
Dried herb shelf life varies depending on the type of herb and how it was stored. Provided you can keep your dehydrated herbs out of high heat and humidity, they can last up to four years in storage! They will taste the best the fresher they are though. A good way to tell if your dried herbs are still worth using is to check for color and taste. If they are beginning to look pale and drab, and don’t smell aromatic anymore they likely won’t taste great either.
Let’s Get Started!
Alright, now that you know basics of why drying your own fresh herbs is so beneficial, and how to store and use them, you’re probably wondering how on earth to get started!
Dehydrating herbs is honestly ridiculously simple.
Start by harvesting your herbs fresh from the garden.
Or else buy them at the farmer’s market or grocery store. Pick the freshest, most aromatic herbs. Try to avoid plants that seem wilted or damaged. If the plants have severe pest damage, avoid those too. The best time of day to pick anything from the garden is first thing in the morning, when the plants are at their freshest before the heat of the day!
After you’ve harvested your herbs, give them a good rinse.
If you suspect bugs mixed in the leaves, soak them in water with a drop of non-toxic dish detergent. Dry the herbs with clean tea towels or paper towels.
Prepare the herbs by chopping or removing stems, depending on the type of plant.
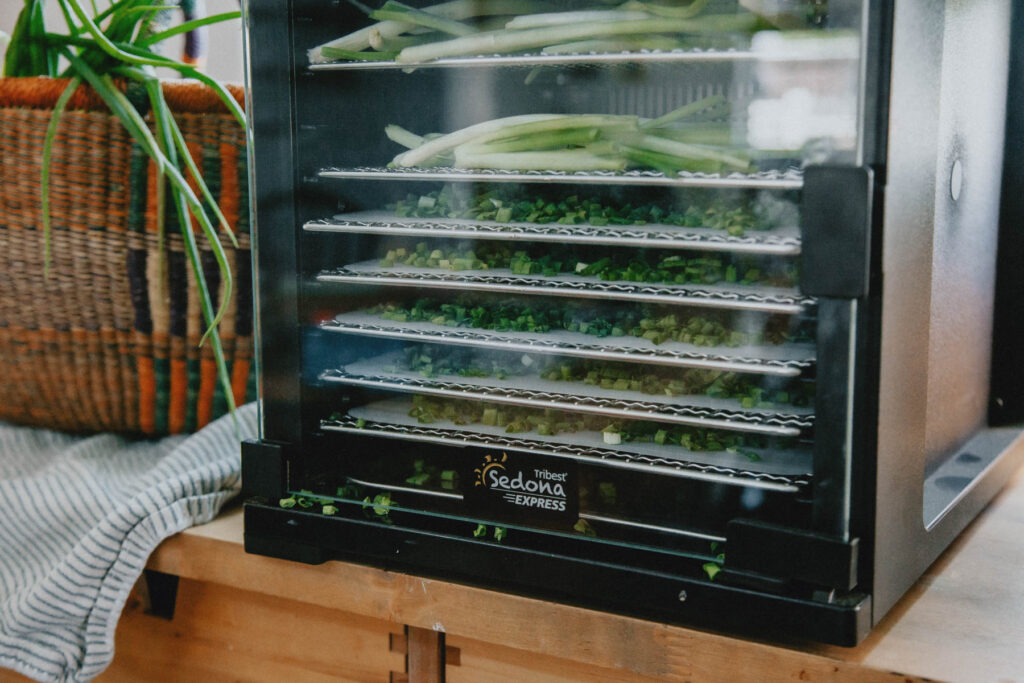
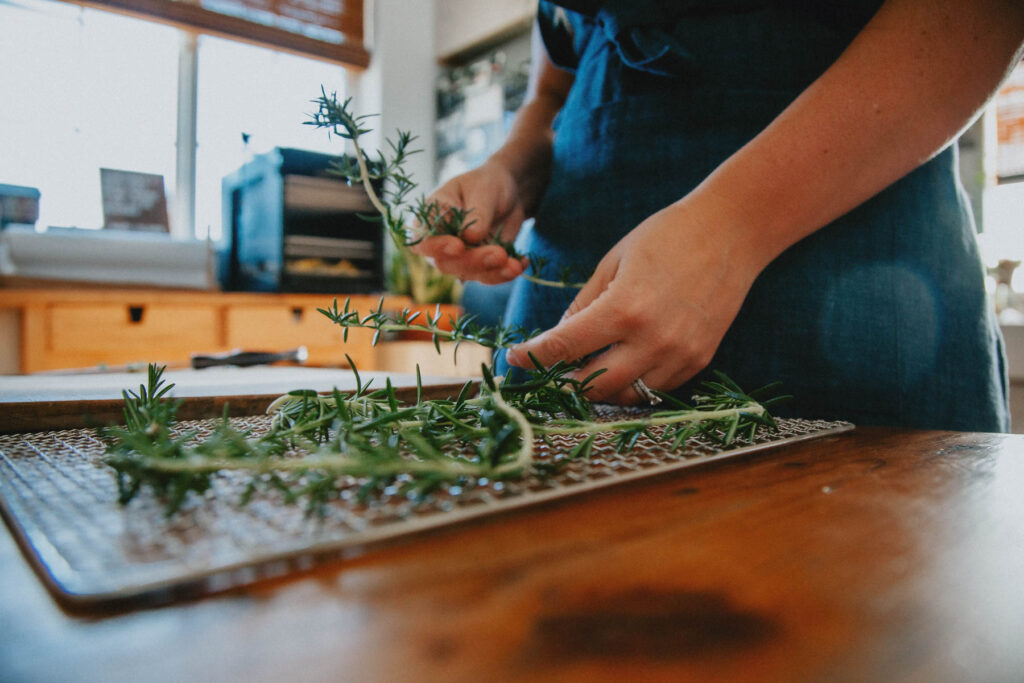
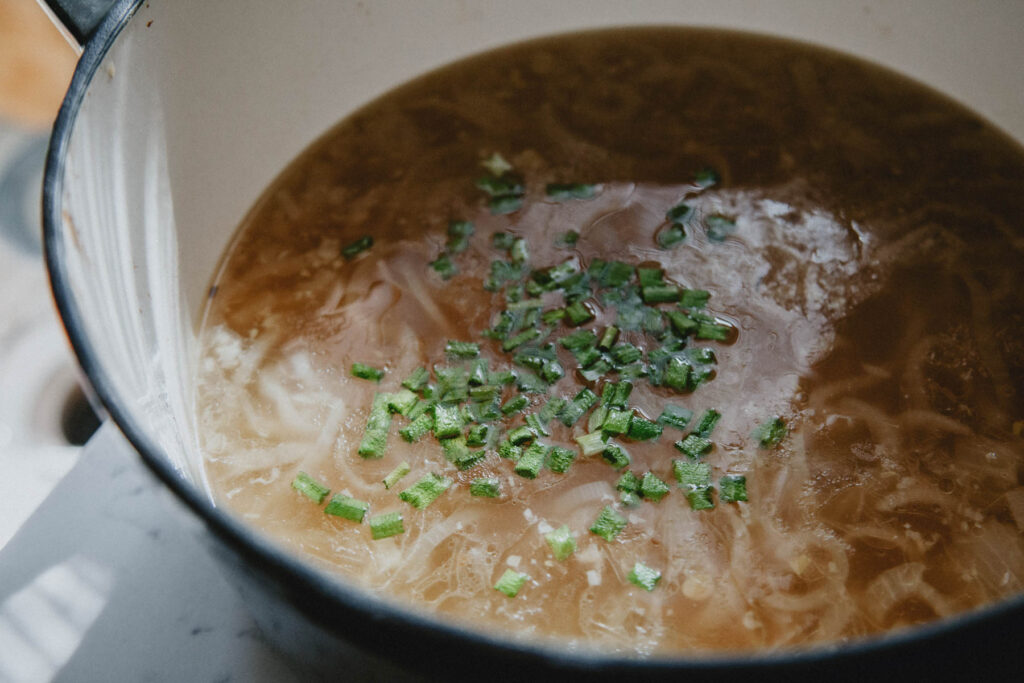
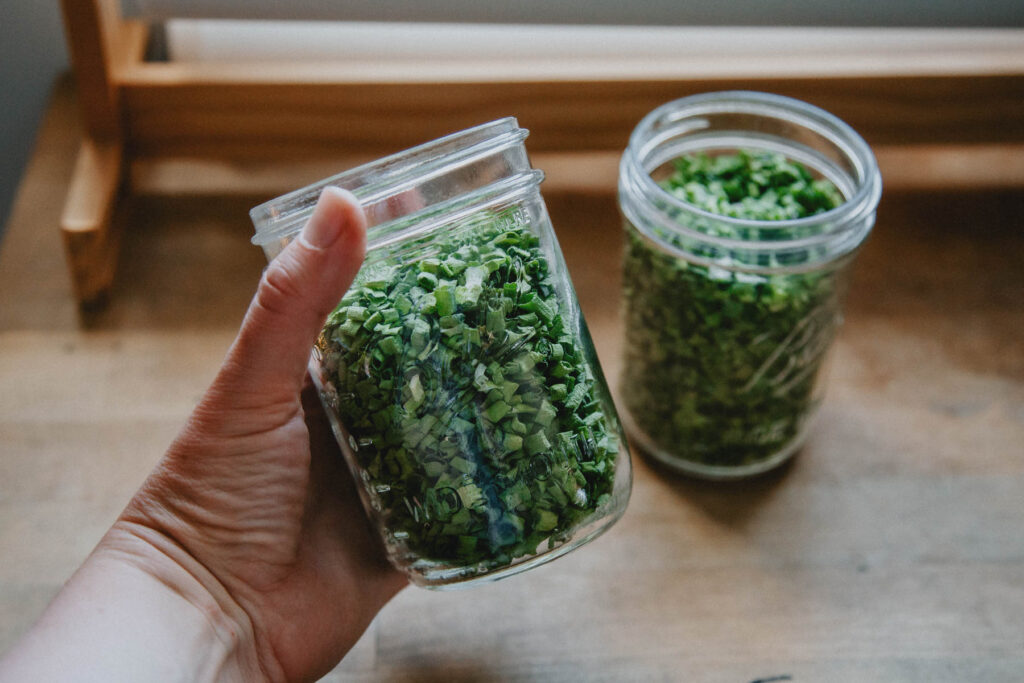
I like to chop green onions into rounds for dehydrating, and I dried the tougher stems as well for adding into my bone broth. For herbs like dill, sage, and parsley, I just removed the tougher stems. Rosemary, thyme, and oregano do best when the stems are left whole and intact. I just pull the tiny leave off of the stems once they have been dehydrated. To dehydrate edible flowers, remove the stems and keep the buds intact.
Lay the herbs out on the dehydrator trays.
For some of the finer or smaller herbs you may find it helpful to use a silicone mat like these ones from Tribest. Try to keep the herbs in a single layer to ensure they dry evenly on all sides.
Place the full trays into the dehydrator and select your preferred temperature.
The Sedona Express allows you to set custom temperatures, but the two default settings are “raw” (110 degrees Fahrenheit) and “fast” (167 degrees Fahrenheit). I prefer to dry herbs on the “raw” setting so that they maintain the most nutritional value. It usually takes between two and four hours to dehydrate leafy/stemmy herbs, and a bit longer for flowers.
That’s it! When the dehydrator has finished its run, check the herbs for dryness. If they seem to still contain some moisture, put them back into the dehydrator until they’re fully dry to allow for the best longterm storage. Store in a glass jar in a cool, dry place.
How to Dry Fresh Herbs In A Dehydrator
- Harvest fresh herbs from your garden, if you didn’t already purchase them at the Farmer’s Market or grocery store. Harvesting plants in the morning will give you the best flavor!
- Rinse the herbs, or soak in water with a drop of non-toxic dish detergent if you suspect bugs are hiding in the leaves.
- Gently pat the herbs dry with paper towels or a clean tea towel.
- Prepare the herbs for the dehydrator. Chop green onions into rounds; remove tough and overly long stems for dill, sage, and parsley; leave the stems intact for rosemary, thyme and oregano (and remove the tiny leaves after dehydrating); remove stems from edible flowers, keeping the bud intact.
- Lay the herbs out in a single layer on the dehydrator trays. For the finer, smaller herbs like diced green onions you may want to use a silicone mat.
- Place the full trays into the dehydrator and select the lowest temperature possible to maintain the most nutritional value in the dried herbs. I like to dry mine at 110 degrees Fahrenheit.
- Dry for 2-4 hours, or until the herbs are crispy and have lost all moisture.
- Check the herbs to see that they’re fully dry before removing from the dehydrator.
- Store in glass jars in a cool, dark place for the best longevity.
It really is that simple!
If you’re in the market for a new dehydrator, check out the Sedona Express, or one of the other awesome dehydrators from Tribest.
Now I’d love to hear what you do with your own freshly dehydrated herbs. Do you make teas or spice blends? Soaps or salves? Leave a comment and let me know!