

Learn to make creamy, tangy Feta in this easy goat milk cheese tutorial. This is the perfect recipe for beginners and experienced cheesemakers alike! The results taste delicious and authentic, and best of all the recipe takes only a couple hours of active work and requires no special equipment to make.

If you’re anything like me, Summer often leaves you swimming in fresh milk with precious little time to actually make anything with it. When I find myself in this predicament, I usually fall back on my simplest cheese recipes to use up the milk and stock the fridge. I’m always really thankful I made something, especially in the future when I’m whipping up a quick meal! Feta is a family favorite for sprinkling on Greek salads, on pizza, or topping homemade lemon herb French fries. I love it on fried eggs and sourdough toast for breakfast, and it also adds some zest to fresh watermelon and mint too! The possibilities are endless.
How Do You Make Feta Cheese?
Feta cheese is traditionally made with sheep or goat milk. Most feta style cheeses you find at the grocery store these days are made with cow milk. I like to make feta cheese with raw milk from my Mini Nubian dairy goats, but any kind of fresh milk will do for this recipe! When using pasteurized milk you will need to add calcium chloride.
The recipe I used for this tutorial comes from New England Cheesemaking. You can find it by visiting the link below! I have adjusted the temperatures and stirring times slightly, as well as changed some of the process to adapt the recipe for my fresh goat milk.


Basic Process for making Goat Milk Feta Cheese:
- Heat the milk to about 90 degrees Fahrenheit.
- Add Mesophilic starter culture and ripen for about 45 minutes.
- Add diluted rennet and stir thoroughly into the milk.
- Allow the milk to coagulate into a solid curd for about 40 minutes.
- Cut the curd into 1/2 inch cubes, allowing the curds to rest for a few minutes between cuts.
- Stir the curds gently for about 20 minutes, or until they have lost some of their moisture and shrunk slightly in size.
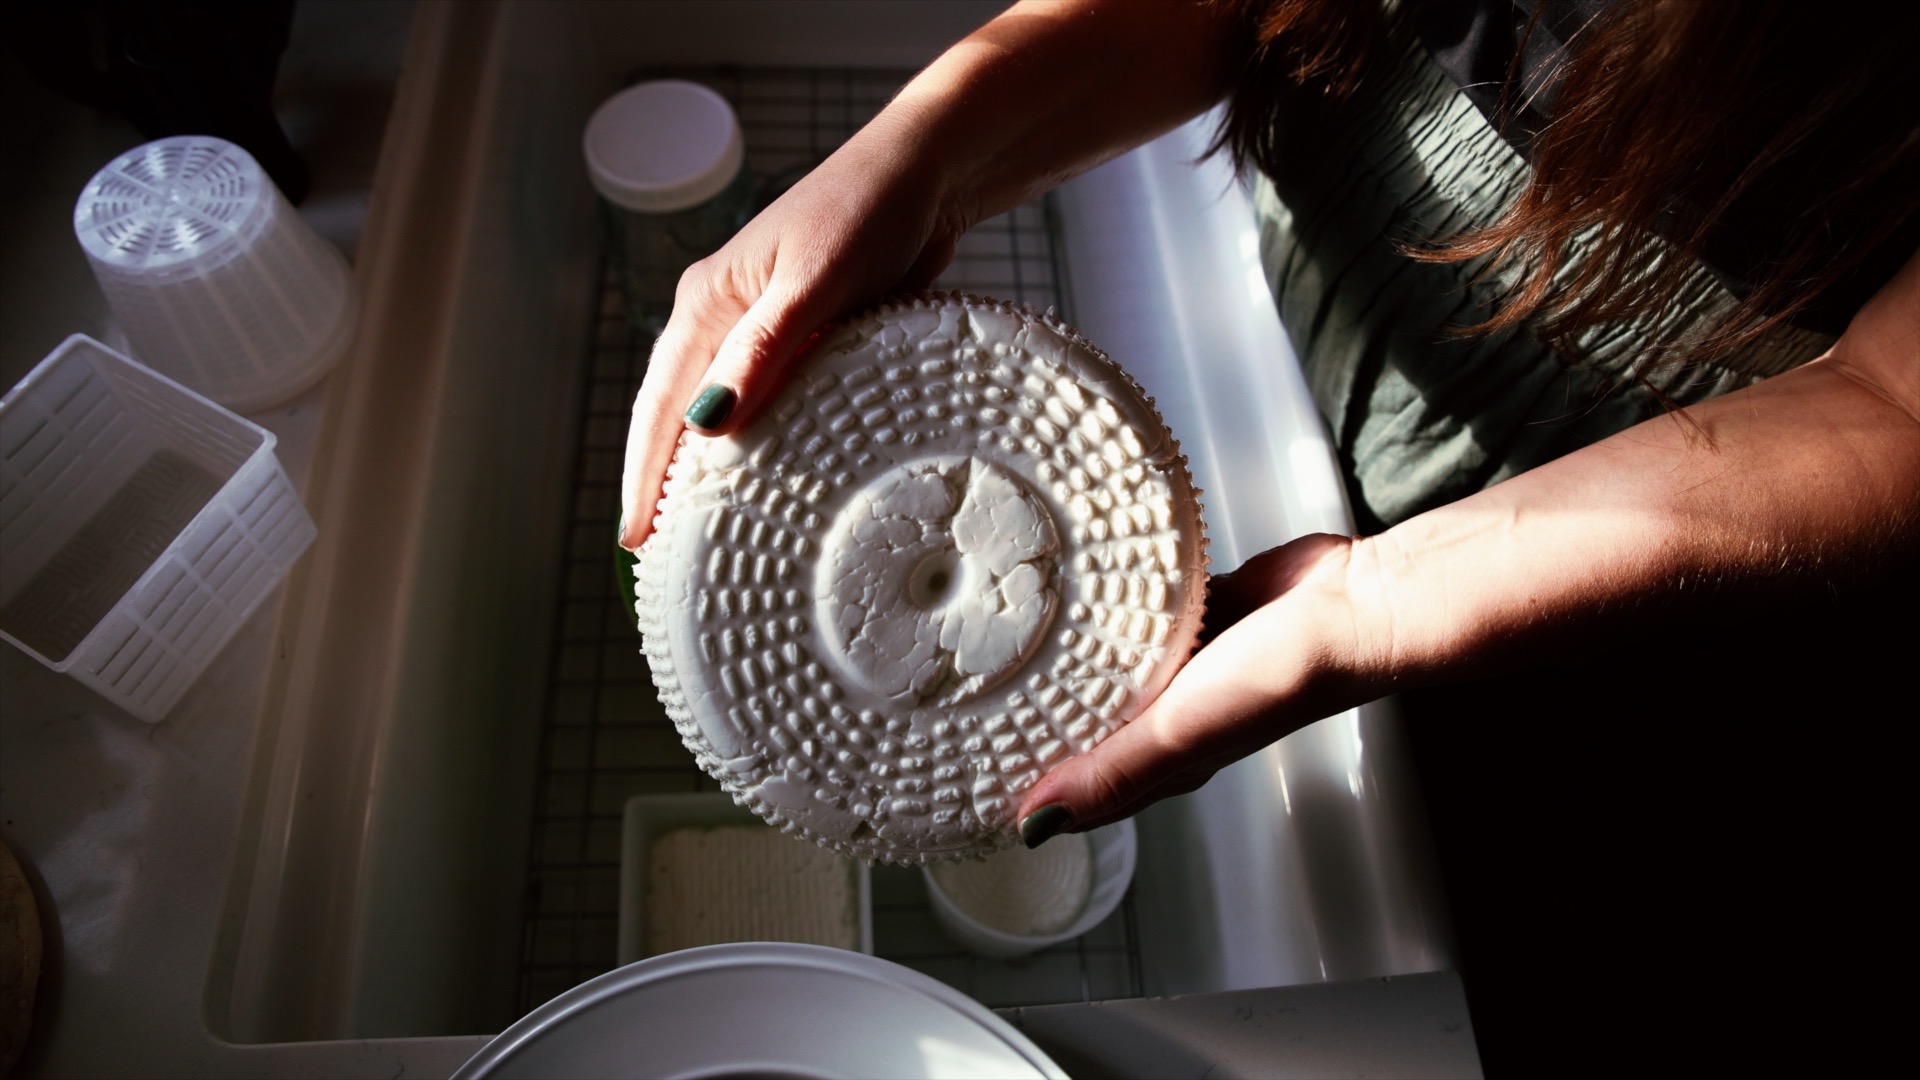
- Allow the curds to settle to the bottom of the pot and gather your baskets/molds.
- Pour off the whey and save for feeding livestock or fertilizing the garden.
- Gently scoop the curds into the baskets and leave them to drain. Flip them a few times within the first couple hours of draining, and then leave them overnight. You can add a small amount of weight to help with pressing if you’d like.
- The next day, when the curds have consolidated into a solid cheese, remove them from the baskets and cut into wedges.
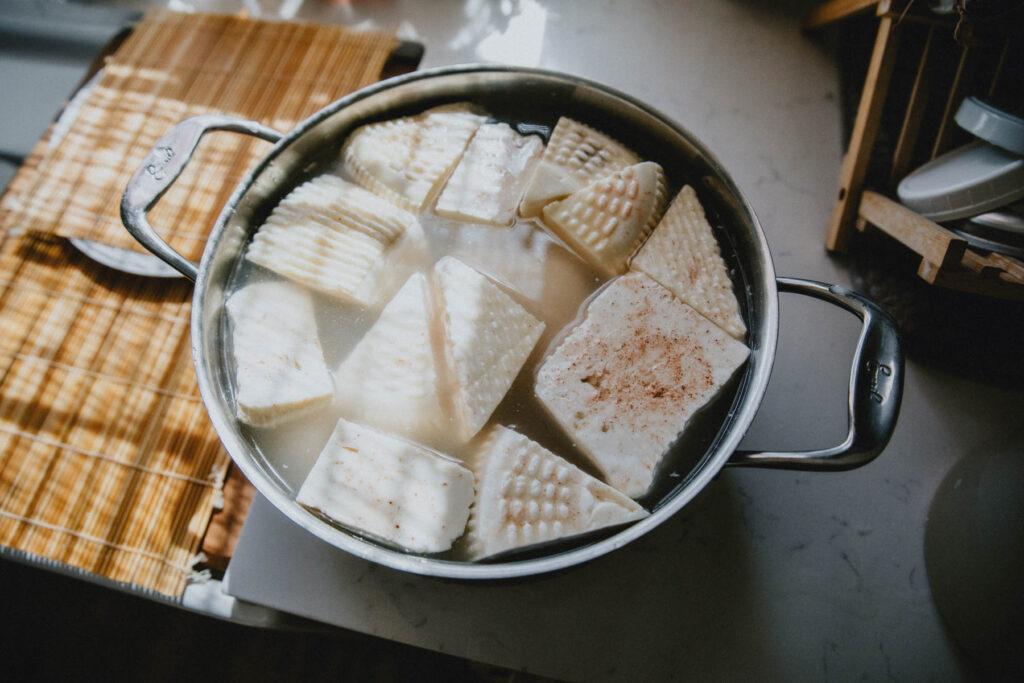
- Lightly salt the wedges and allow them to drain on a plate or reed drying mat until dry to touch.
- Place the dry wedges into a saturated brine (recipe below) for 4-6 hours, depending on the size of the wedges.
- Remove the Feta wedges from the brine and allow them to dry on a reed drying mat for a couple of days. You can cover them with a colander, or place them in the fridge if your kitchen is warm. Allow them to dry thoroughly and assimilate the salt from the brine.
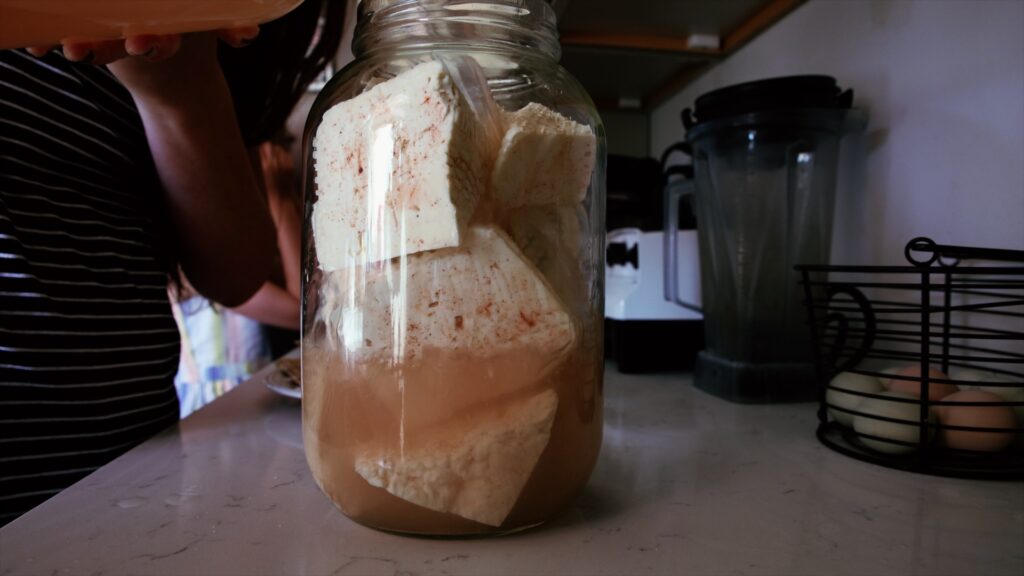
- Once the surface of the cheese is dry and slightly hardened, place the wedges into an 8% storage brine (recipe below) and keep in a cool, dark environment. I keep my feta in the fridge, but you could keep them in a root cellar or basement if you have a good environment for storing food.
- Allow the Feta to age in the brine for about a month before using. After that the cheese will stay fresh in its brine for a year or more!
- If the cheese is too salty for your liking, you can rinse it or soak it in a bit of milk before using.
So that’s my simple Feta cheese tutorial with goat milk!
For details on making your own saturated and storage brines, scroll down to find instructions below, as well as links to some helpful articles on how to maintain your brines and common questions about storing cheese in brine.
Shop This Tutorial:
Affiliate Disclosure: these are affiliate links, which provide me a small percentage of your order, at no extra cost to you.
How to Make a Saturated Brine:
I have found this recipe for making a saturated brine very helpful in my cheesemaking! Don’t skip the calcium chloride. I can tell you from experience that it’s very handy in preventing your cheese from disintegrating into the brine. I also love that this brine can be reused practically indefinitely if properly stored and refreshed from time to time!
Basic Process for Making a Saturated Brine:
- To 1 gallon of non-chlorinated drinking water, add 2.25 lbs of non-iodized salt, 1 Tbsp calcium chloride (30% solution), and 1 tsp of white vinegar.
- Stir the mixture together in a large non-reactive container, such as a gallon glass mason jar.
- Store in the fridge when not in use, and always stir the brine before using.
- A saturated brine is created by adding salt until no more can be dissolved in the water. There will always be a sediment of salt at the bottom of the jar, and the cheese should float in your brine.
How to Make a Storage Brine:
A storage brine is typically around 6%-8% salt, and is meant for storing semi-soft, fresh cheeses such as Feta, Mozzarella, and Halloumi. I have found this article from New England Cheesemaking helpful for understanding how to use and maintain a storage brine.
Basic Process for Making a Storage Brine:
- To 3 quarts of non-chlorinated drinking water, add 6-8 oz of non-iodized salt. You can also add 1-2 tsp of calcium chloride to this brine. I have tried both ways and had success both ways. If your feta has sufficiently surface dried before adding to the storage brine it likely won’t fall apart in the brine, but if you are concerned go ahead and add in the calcium chloride.
- Thoroughly stir the salt into the water before adding the cheese. Keep the brine in a non-corrosive container, such as a glass mason jar.
- Store the brine in a cool, dark place such as a cool room or cellar, or in the refrigerator.
So that’s it in a nutshell! A super simple tutorial for making Feta cheese at home. I love that with just a couple hours of hands on time I can make a whole year’s worth of feta cheese for my family and keep it in the fridge to pull out as needed. Goat milk Feta is particularly authentic in taste, thanks to the enzymes that give fresh goat cheese its signature tang.
If you make this recipe and follow my tutorial I’d love to hear how it turned out!
Happy cheesemaking!